Are you tired of the anxiety that comes with parking your car in tight spaces or reversing with limited visibility? Imagine having a backup camera kit that not only enhances your safety but also provides you with convenience.
Well, look no further because we have compiled a list of the four best backup camera kits that will meet your needs. From the WOLFBOX G840S 12 4K Mirror Dash Cam Backup Camera to the Mirror Dash Cam with Night Vision and Full Touch Screen, these kits offer a range of features that will surely impress.
But which one is the best fit for you? Stay tuned as we explore each kit in detail and help you make an informed decision.
Key Takeaways
- The WOLFBOX G840S 12 4K Mirror Dash Cam Backup Camera offers a large 12-inch screen with a smart screen split function for improved visibility.
- The LeeKooLuu Backup Camera with Monitor Kit (LK3) features a 4.3-inch LCD monitor with adjustable settings for personalized viewing.
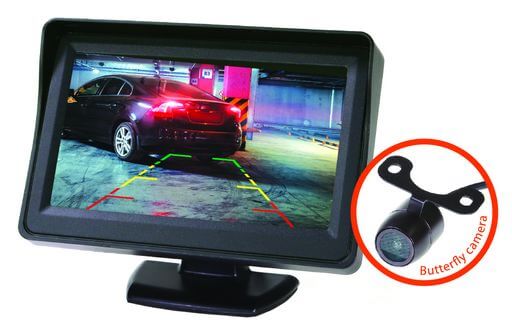
- The DoHonest Wireless Backup Camera Magnetic with Solar Power (V35) includes a 5-inch display with a bright and clear LCD screen for easy monitoring.
- The Mirror Dash Cam with Night Vision and Full Touch Screen (10 Meters Cable) provides a 10-inch IPS streaming media full touch screen for enhanced convenience.
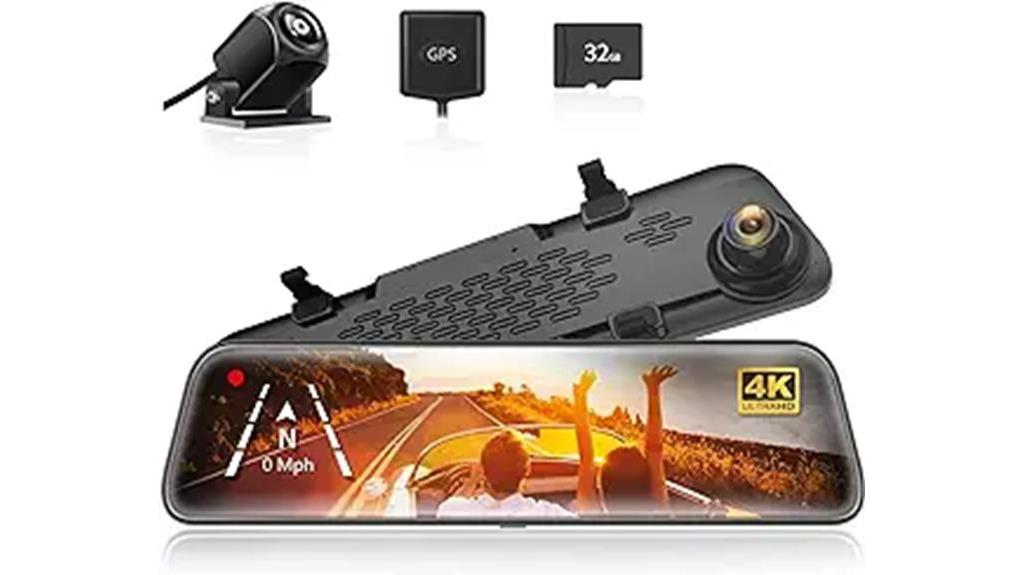
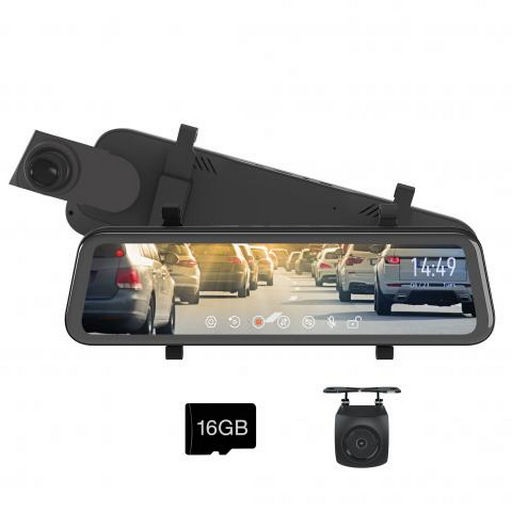
WOLFBOX G840S 12 4K Mirror Dash Cam Backup Camera (Free 32GB Card & GPS)
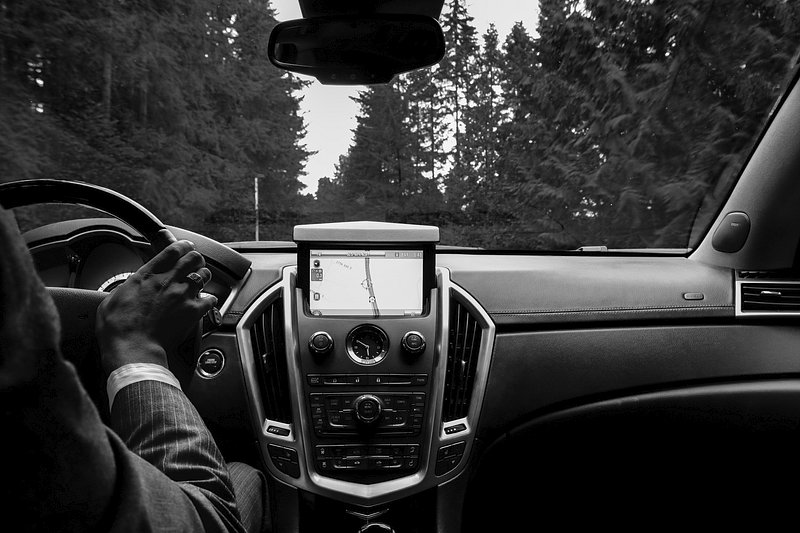
If you’re looking for a backup camera kit that offers enhanced safety and convenience, the WOLFBOX G840S 12 4K Mirror Dash Cam Backup Camera (Free 32GB Card & GPS) is an excellent choice. With upgraded 4K UHD resolution for both front and rear cameras, you can expect clear and high-quality images. The 12′ larger screen with smart screen split function allows you to view both camera feeds simultaneously.
Additionally, the GPS tracking feature, along with the external GPS antenna, ensures accurate location tracking. The 24H precise parking monitor provides continuous surveillance, and the USB C power supply offers convenience and reliability. With other smart functions such as streaming media rearview and mirror flip of the rear image, this backup camera kit offers a comprehensive solution for your safety and convenience needs.
Best For: Users looking for a high-quality backup camera kit with 4K UHD resolution, GPS tracking, and smart functions.
Pros:
- Upgraded 4K UHD resolution for clear and high-quality images
- 12′ larger screen with smart screen split function for simultaneous viewing of both camera feeds
- GPS tracking with external GPS antenna for accurate location tracking
Cons:
- Possible glare issue with the mirror, especially in overcast conditions
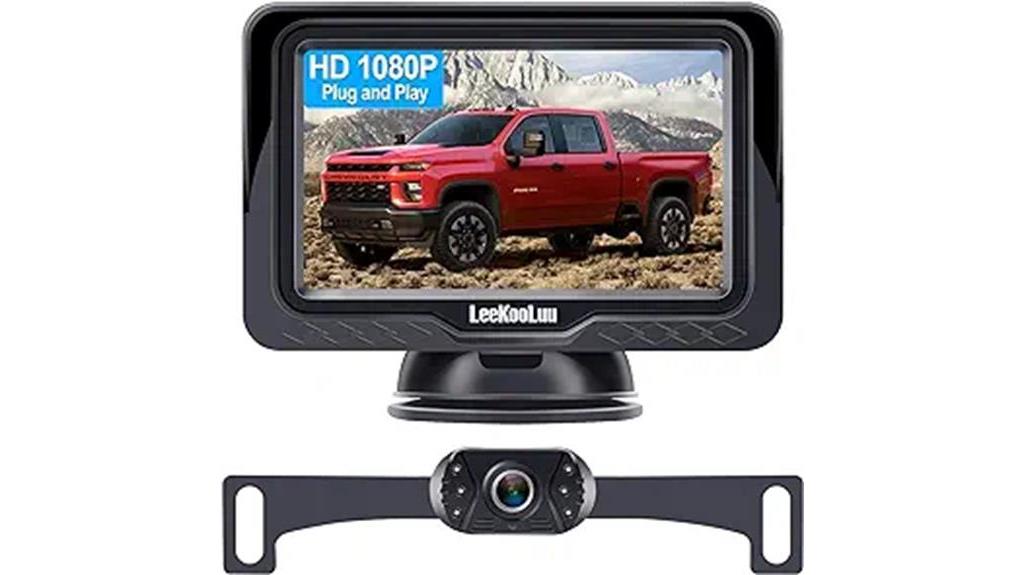
LeeKooLuu Backup Camera with Monitor Kit (LK3)
For those seeking a reliable and user-friendly backup camera kit, the LeeKooLuu Backup Camera with Monitor Kit (LK3) offers an array of features for enhanced safety and convenience.
This kit provides a plug and play installation, making it easy to set up and adjust. The HD 1080P image ensures clear visibility, while the stable signal transmission ensures a consistent connection. The camera is IP69 waterproof and high-temperature resistant, ensuring durability in various weather conditions. The DIY parking grid lines and image flip feature allows for customizable parking assistance.
The 4.3 inch LCD monitor comes with adjustable brightness, contrast, and color settings. Users have praised the ease of installation and operation, as well as the good image quality and visibility.
With its competitive price and comprehensive features, the LeeKooLuu Backup Camera with Monitor Kit (LK3) offers great value for the price.
Best For: Those looking for an affordable and easy-to-install backup camera kit with customizable parking assistance and good image quality.
Pros:
- Plug and play installation for ease of setup
- HD 1080P image for clear visibility
- Adjustable parking grid lines and image flip feature for personalized parking assistance
Cons:
- Some challenges with finding and connecting the wires to the reverse light
DoHonest Wireless Backup Camera Magnetic with Solar Power (V35)
The DoHonest Wireless Backup Camera Magnetic with Solar Power (V35) offers a strong, stable signal and easy installation, making it the ideal choice for those seeking enhanced safety and convenience in their backup camera kit.
This backup camera kit features a magnetic base, allowing for a quick and hassle-free installation process. With its rechargeable battery, you can enjoy a long working time without the need for constant recharging. The camera also provides a strong and stable signal with a digital wireless range of up to 36ft. Additionally, the DoHonest Wireless Backup Camera Magnetic (V35) offers HD 1080P image quality and super night vision, ensuring a clear view even in low-light conditions. With its 5-inch display, you have multiple options for placement.
Overall, this backup camera kit provides a reliable and user-friendly solution for enhancing safety and convenience while backing up.
Best For: Individuals looking for a convenient and easy-to-install backup camera kit with a strong and stable signal.
Pros:
- Quick and hassle-free installation with a strong magnetic base.
- Rechargeable battery with long working time, eliminating the need for constant recharging.
- HD 1080P image quality and super night vision for clear visibility in low-light conditions.
Cons:
- Limited to a 36ft digital wireless range.
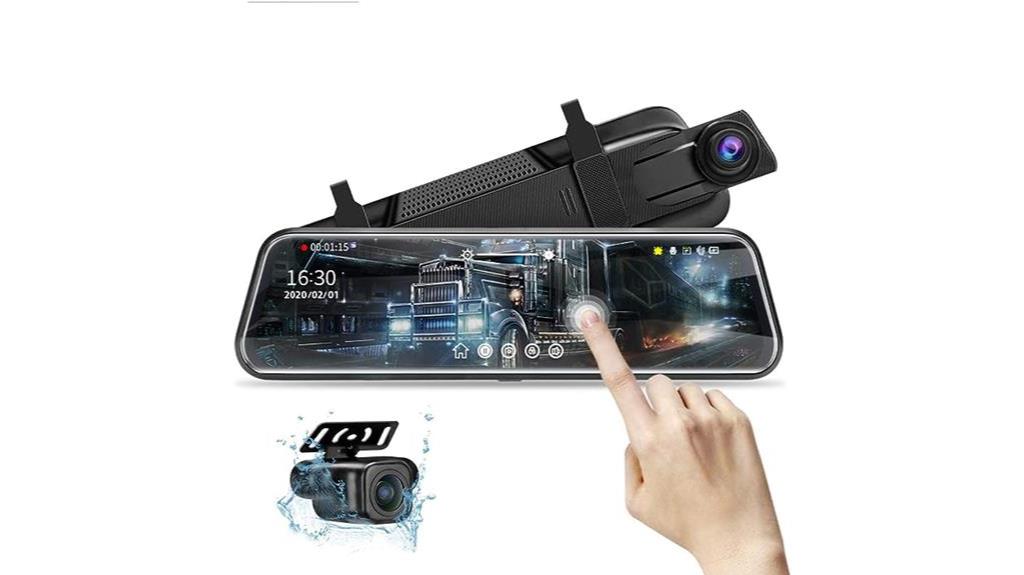
Mirror Dash Cam with Night Vision and Full Touch Screen (10 Meters Cable)
With its dual 1080P front and rear cameras, 10-inch IPS streaming media full touch screen, and super night vision, the Mirror Dash Cam with Night Vision and Full Touch Screen (10 Meters Cable) ensures enhanced safety and convenience for drivers. This dash cam offers clear video and captures license plates from a distance, thanks to its wide-angle lens that reduces blind spots and captures details on the road. The touch screen controls make it easy to operate, and it functions as both a rear and front dash cam. Users have reported that it works well during light to moderate rain, but may be affected during heavy rain.
Overall, customers have praised its performance, installation, and usage, with some minor drawbacks mentioned. The Mirror Dash Cam with Night Vision and Full Touch Screen (10 Meters Cable) is a reliable choice for drivers seeking advanced safety features.
Best For: Drivers who prioritize enhanced safety features and convenience in their vehicles.
Pros:
- Dual 1080P front and rear cameras with wide-angle lens reduce blind spots and capture clear video
- 10-inch IPS streaming media full touch screen for easy operation
- Super night vision and parking assistance for enhanced safety
Cons:
- May be affected during heavy rain
Factors to Consider When Choosing Backup Camera Kits
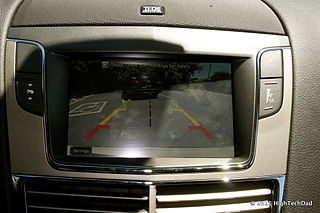
When choosing a backup camera kit, there are several key considerations to keep in mind. First, think about the installation options available, such as wireless or wired setups. Next, consider the image quality factors, like resolution and viewing angle, to ensure clear visibility. And also remember, night vision capabilities and display features, such as screen size and brightness, are important aspects to consider for optimal convenience and safety.
Key Considerations
Consider the resolution and image quality of backup camera kits, such as HD or 4K, for clear visibility. Higher resolution cameras provide sharper images, making it easier to see obstacles and objects behind your vehicle.
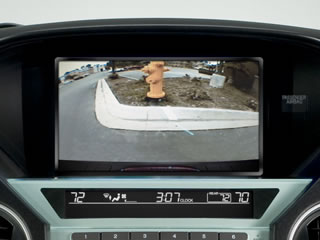
Look for kits that offer features like night vision and parking assistance, as these can greatly enhance safety and convenience. Night vision allows you to see clearly even in low light conditions, while parking assistance provides guidelines or sensors to help you park accurately.
Evaluate the installation process, ensuring that the kit is compatible with your vehicle and that the wiring isn’t too complicated. Also, check for additional features like adjustable display settings, loop recording, and parking monitor functions.
Installation Options
To choose the right backup camera kit, you need to evaluate the type of installation required and consider factors such as mounting options and power source. First, determine whether you prefer a wired or wireless installation. Wired kits require running cables from the camera to the display unit, while wireless kits transmit the signal wirelessly.
Next, evaluate the ease of installation and whether any specific tools or skills are necessary. Look for mounting options that suit your preferences, such as dash, windshield, or tailgate mounting. Consider the power source required for the camera, whether it’s connected to the reverse light, 12V fuse box, or uses a rechargeable battery.
Lastly, check if the kit includes detailed instructions or video guides to assist you during the installation process.
Image Quality Factors
For clear and detailed visuals, prioritize image quality when choosing a backup camera kit. High resolution is crucial in capturing better image clarity. Look for cameras with 4K UHD or 1080P resolution for more detailed visuals. Additionally, consider backup camera kits with enhanced night vision capabilities to ensure visibility in low-light conditions. These cameras use advanced technology to capture clear images even in the dark.
Wide-angle lenses are also important as they help reduce blind spots and capture more details in the image. Lastly, features like adjustable brightness, contrast, and color contribute to better image quality by allowing you to customize the visuals according to your preferences.
Night Vision Capabilities
When selecting a backup camera kit, one important factor to consider is the night vision capabilities. This ensures clear and enhanced visibility in low light or dark conditions. Having a backup camera with reliable night vision technology is crucial for safe and convenient driving, especially during nighttime or in areas with poor lighting.
The use of super night vision technology provides high-quality images and improved visibility. This allows you to clearly see obstacles and hazards that may be difficult to detect with the naked eye. Advanced night vision features ensure that the camera captures clear and detailed images even in low-light environments. This allows for effective monitoring of surroundings and capturing of clear footage during nighttime use.
With enhanced night vision functionality, you can rely on your backup camera to provide reliable performance and clear imaging. This gives you peace of mind while maneuvering your vehicle in low-light or dark environments.
Display Features
Consider the display features carefully when choosing a backup camera kit for your vehicle.
The WOLFBOX G840S 12 4K Mirror Dash Cam Backup Camera offers a 12-inch large screen with a smart screen split function, allowing you to view multiple camera angles simultaneously.
The LeeKooLuu Backup Camera with Monitor Kit (LK3) provides a 4.3-inch LCD monitor with adjustable brightness, contrast, and color for optimal display customization.
The DoHonest Wireless Backup Camera Magnetic with Solar Power (V35) boasts a 5-inch display with a bright and clear LCD screen, offering multiple placement options for your convenience.
Finally, the Mirror Dash Cam with Night Vision and Full Touch Screen (10 Meters Cable) features a 10-inch IPS streaming media full touch screen, ensuring a high-quality and user-friendly display.
Choose the backup camera kit with display features that suit your preferences and needs.
Wireless Vs Wired
To determine the best backup camera kit for your vehicle, take into account the key factors of wireless versus wired systems. Wired backup camera kits require physical connections for power and transmission, while wireless kits rely on signals for communication.
Wired systems offer more stable and consistent signal transmission compared to wireless setups. However, installation of wired kits involves routing and connecting cables from the rear of the vehicle to the display unit, making it a more labor-intensive process.
On the other hand, wireless kits are easier to set up due to no wiring requirements. Wired backup camera kits may be more suitable for larger vehicles or those with complex setups, while wireless kits are often preferred for simpler installations.
And, wired systems are less susceptible to interference and signal loss, making them a reliable choice for a consistent video feed.
Warranty and Support
If you’re looking for a backup camera kit that offers peace of mind and reliable support, one important factor to consider is the warranty and support provided. Check the duration of the warranty, including whether it covers parts and labor.
It’s also crucial to look for information on the customer support offered for troubleshooting and technical assistance. Verify if the warranty requires product registration and if it’s transferable in case of resale. Additionally, consider the availability of extended warranty options for additional protection.
Research the process for warranty claims and whether there are service centers available for repairs.
Frequently Asked Questions
How Long Does the Battery Last on the Dohonest Wireless Backup Camera Magnetic With Solar Power (V35)?
The battery on the Dohonest wireless backup camera magnetic with solar power (V35) lasts for a long time. You won’t have to worry about constantly recharging it because it gets power from the sun.
Can the Mirror Dash Cam With Night Vision and Full Touch Screen (10 Meters Cable) Be Easily Installed on Any Type of Vehicle?
Yes, the mirror dash cam with night vision and full touch screen (10 meters cable) can be easily installed on any type of vehicle. It provides enhanced safety and convenience for your driving experience.
What Is the Warranty Period for the WOLFBOX G840S 12 4K Mirror Dash Cam Backup Camera?
The warranty period for the Wolfbox G840S 12 4K mirror dash cam backup camera is not specified without the context of The 4 Best Backup Camera Kits for Enhanced Safety and Convenience.
Does the Leekooluu Backup Camera With Monitor Kit (Lk3) Have Adjustable Viewing Angles?
Yes, the Leekooluu backup camera with monitor kit (LK3) does have adjustable viewing angles. You can easily adjust the camera to get the perfect view of what’s behind your vehicle.
Are There Any Additional Features or Functions in the Mirror Dash Cam With Night Vision and Full Touch Screen (10 Meters Cable) That Enhance Convenience and Safety?
Yes, the mirror dash cam with night vision and full touch screen (10 meters cable) has additional features and functions that enhance convenience and safety, such as adjustable viewing angles and enhanced visibility in low-light conditions.
Final Thoughts
When it comes to ensuring enhanced safety and convenience, the WOLFBOX G840S 12 4K Mirror Dash Cam Backup Camera, LeeKooLuu Backup Camera with Monitor Kit, DoHonest Wireless Backup Camera Magnetic with Solar Power, and Mirror Dash Cam with Night Vision and Full Touch Screen are among the best backup camera kits to consider.
These kits offer features such as GPS, solar power, and night vision, providing drivers with reliable and convenient options for safe reversing.
Related Articles
Be sure to also check out these articles right here at Motion Performance Motorsports
The Complete Buyers Guide for Backup Cameras
Next Backup Camera Review:
Previous backup Camera Review:
from
https://motionperformancemotorsports.com/backup-cameras/backup-camera-reviews/best-backup-camera-kits/